The Showcase block allows listing and highlighting the courses that are available on the platform so the people can know them and learn more about their characteristics before enrolling in them.
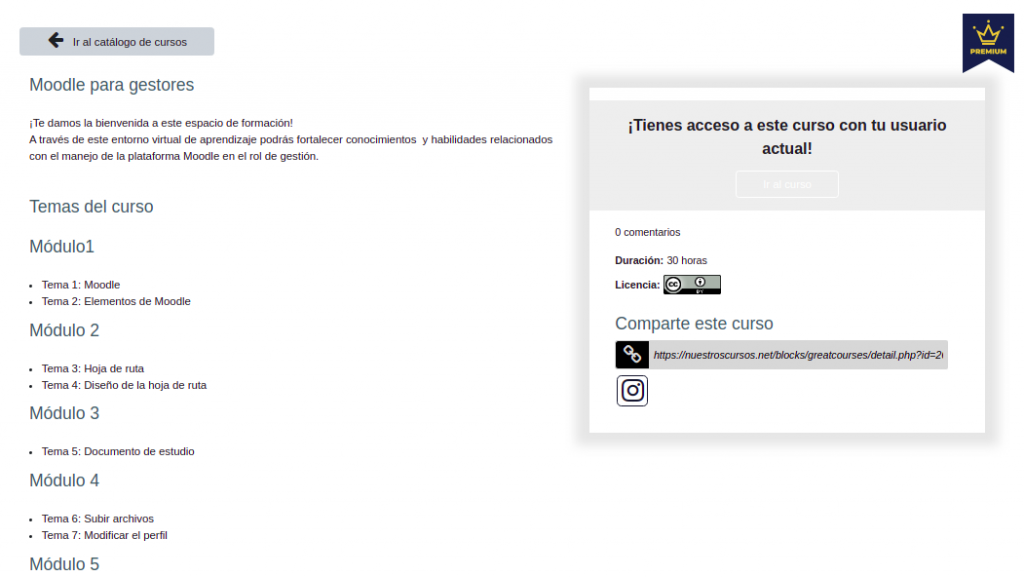
If the user is interested in one of the courses shown in the block, they will be able to enter and read information such as comments, duration, learning objectives, course topics, subject matter experts, among others, before enrolling. The information is displayed according to the description made inside the courses, in the dynamic fields defined for this purpose.
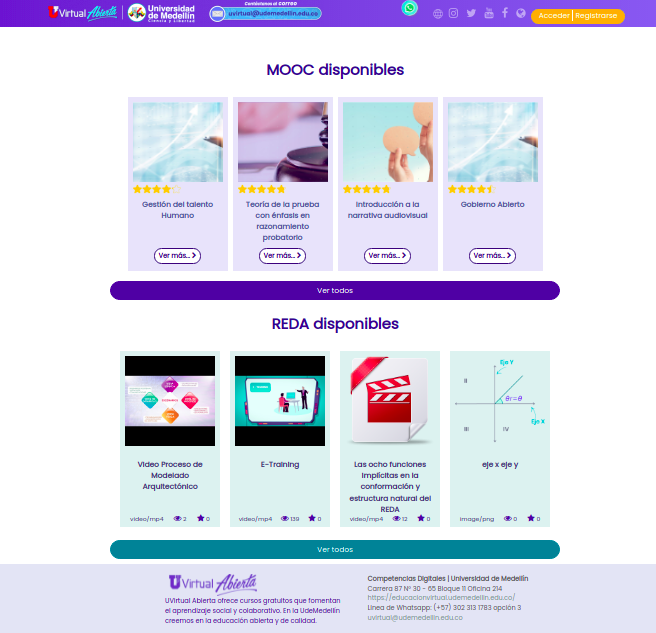
Image retrieved from: https://uvirtualabierta.udem.edu.co/
Add Showcase block
The Showcase block can be used on different pages, the most commonly used is the home page. To add the block on the home page it is necessary to click at “Blocks editting on”.

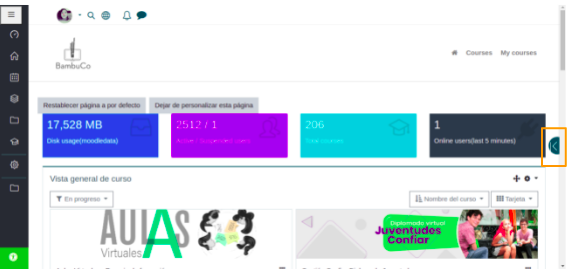
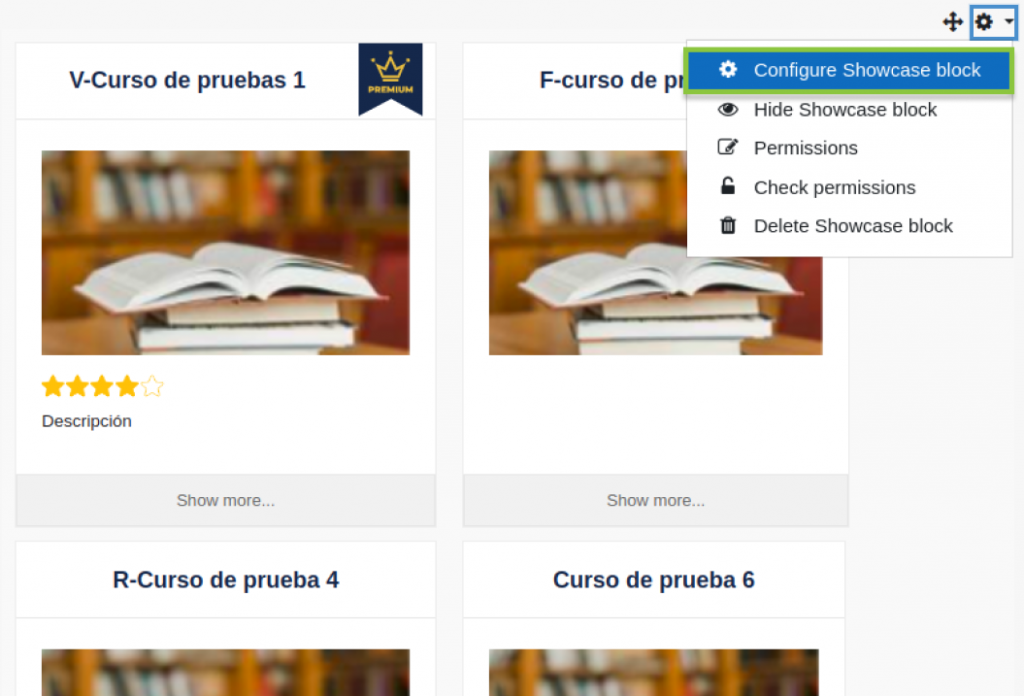
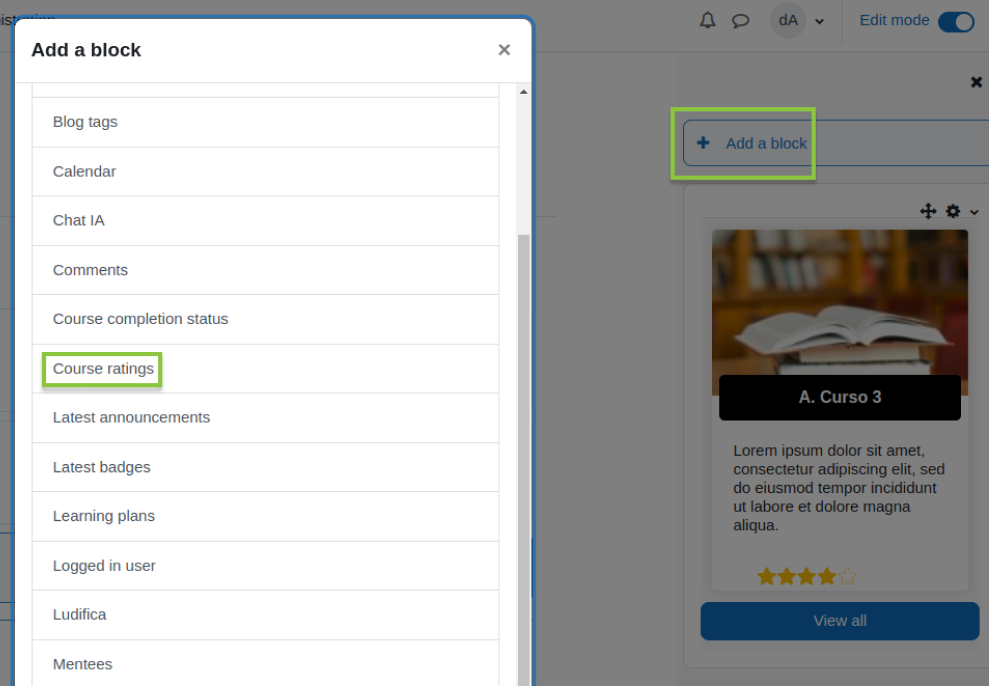
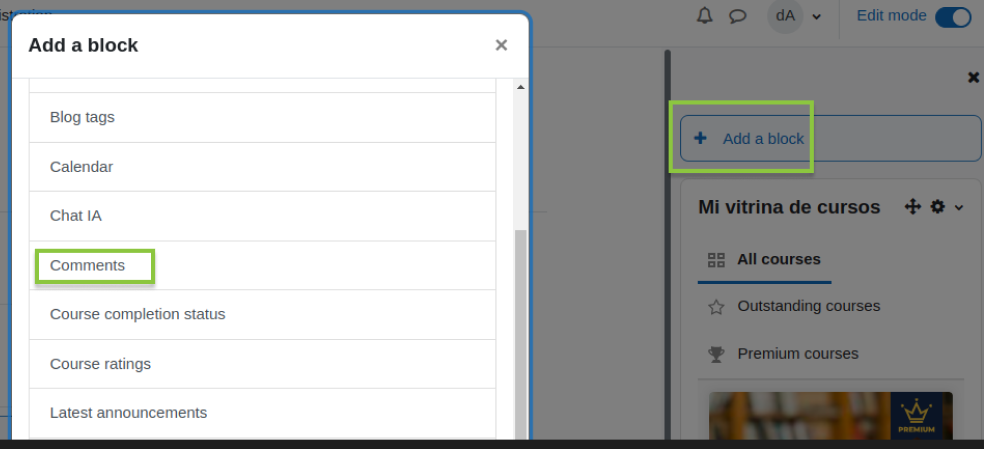
Once the block editing is activated, click on “Add a block” and then on “Showcase“, it will be displayed on the screen. In case it is hidden, it is necessary to click on the tab located on the right side (see Image 4) and adjust the location by dragging the block ![]() to the desired place or specify a location in the block configuration.
to the desired place or specify a location in the block configuration.

For the block to work properly with all its functionalities, it is necessary to make several configurations in the site administration, for example, adding custom fields to the courses as metadata also adding the comments and ratings blocks in order to highlight the courses. More on this later.
Configure the block instance and use it in different contexts.
Block instance configuration
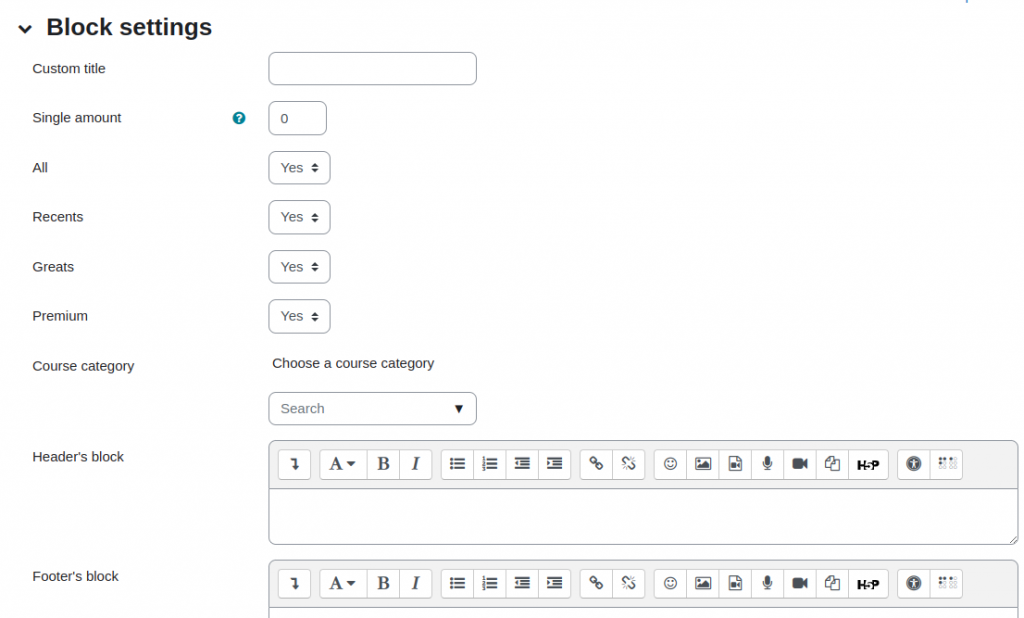
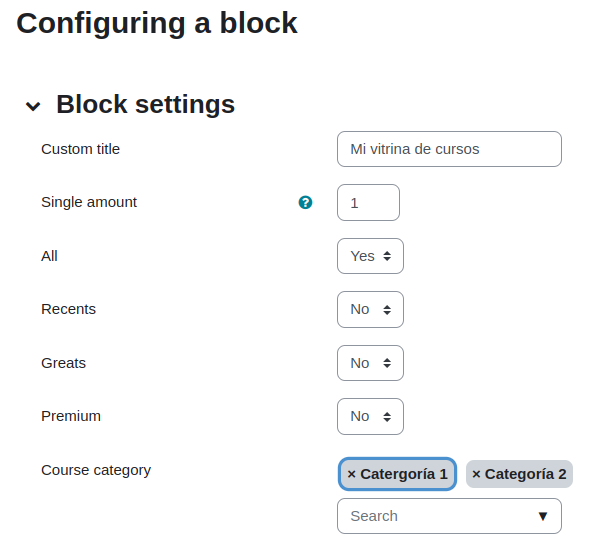
Personalized title:
By default the block is titled with the name of the component. If you want to display the block without a title or you want to define one, you can do it in the block configuration.
Simple quantity:
Define here the maximum number of courses that will be displayed in the block. By default the amount it takes is the amount defined in the site level configuration, however, if you give it a value in the block configuration, the amount defined in the instance will be displayed.
Views:
Enable from the block configuration its different views. If in your configuration you do not see any of the options shown in image 8, it is possible that the site does not have the following conditions:
- Recents: To display those courses that are about to start, the “Days for upcoming courses” field of the block’s site-level configuration must be set to some value.
- Greats: Greats are those courses that have been rated by at least one user with the ‘rate_courses‘ block. If you wish to display this option, your Moodle site must have the above mentioned block installed.
- Premium: To display this checkbox, the administrator must configure the ‘options for paid courses’ in the site-level configuration of the block. This will be addressed later.
Course categories:
The block will only display those courses that belong to the categories you choose here.If you do not have any categories defined, the block will display those configured by the administrator in the block’s site-level settings.
Block header and footer:
If you want to display some content above and/or below the block, you can define it in the HTML editors.
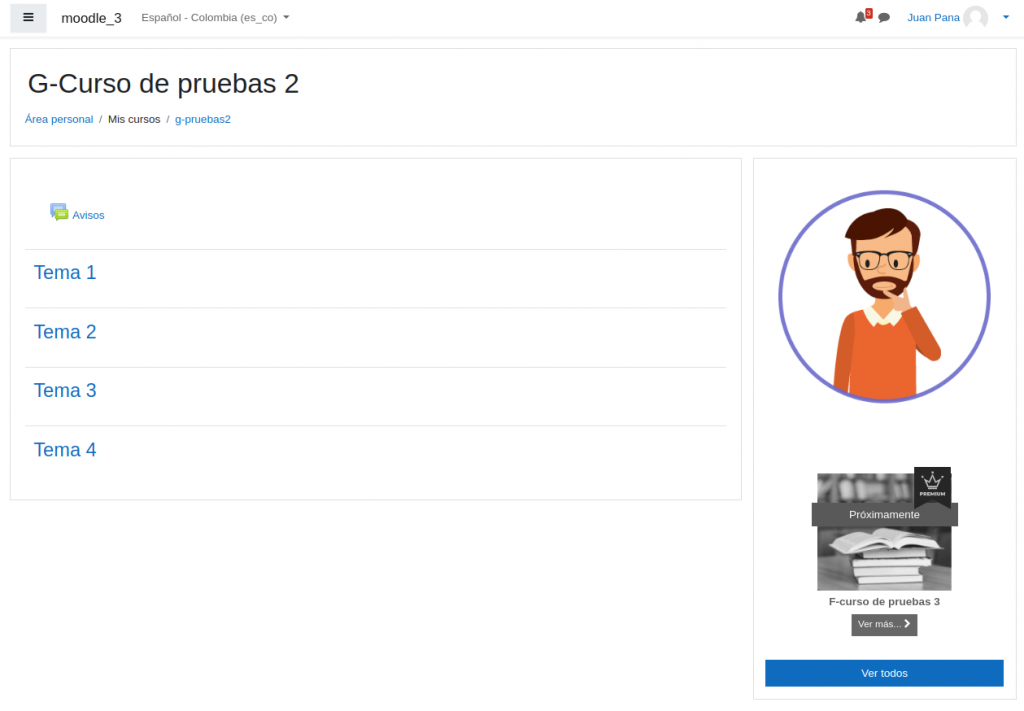
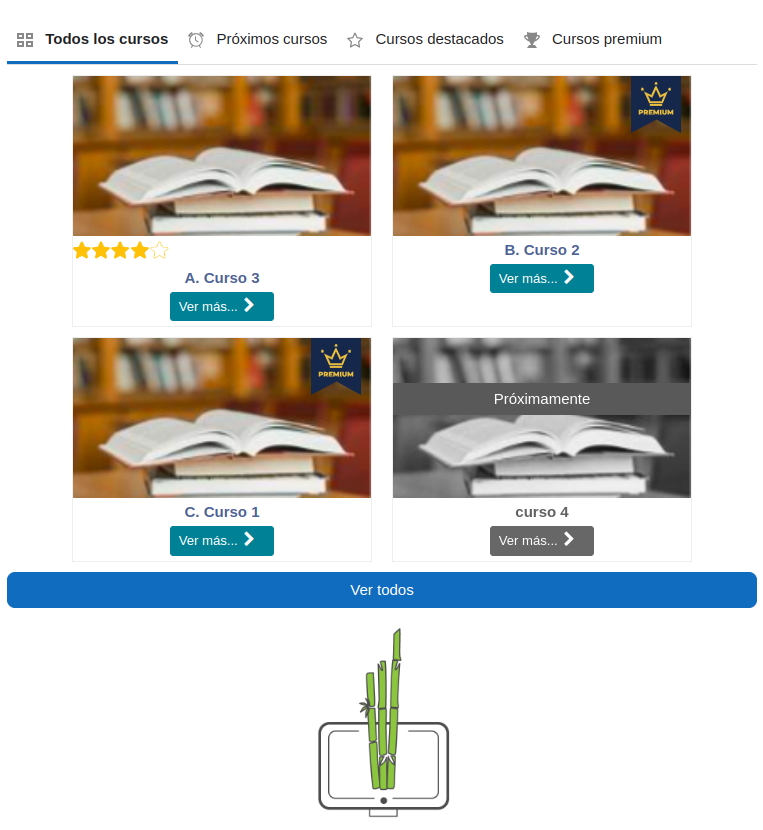
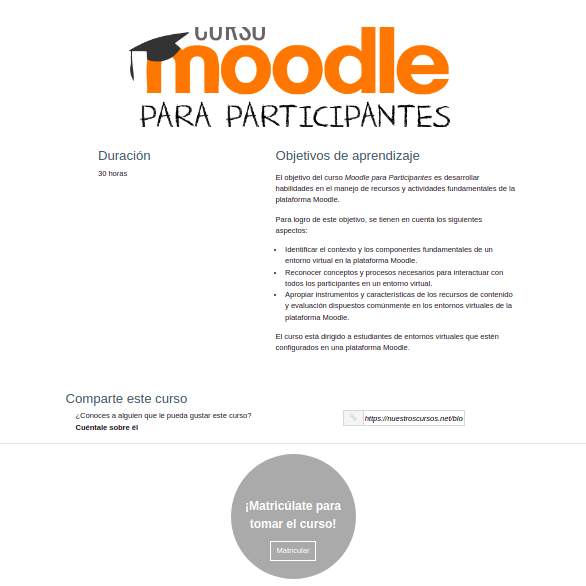
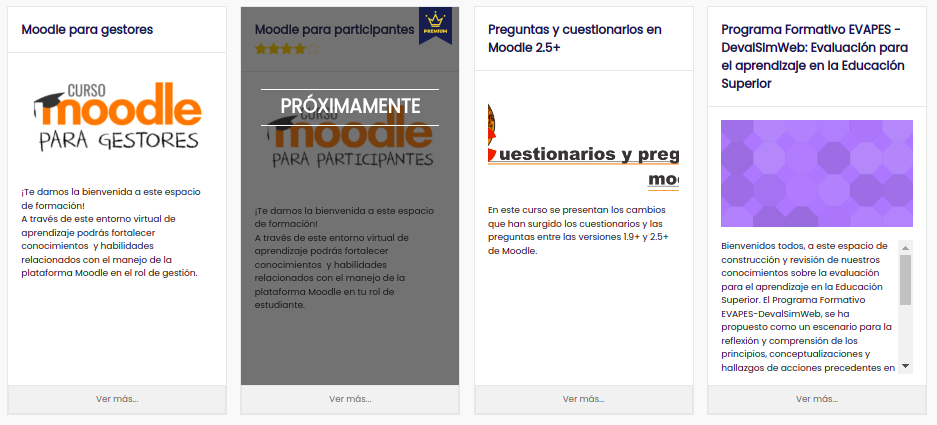
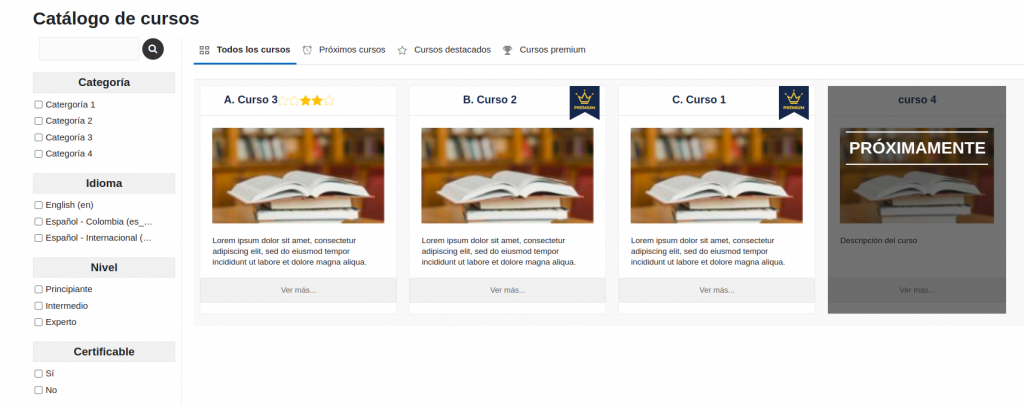
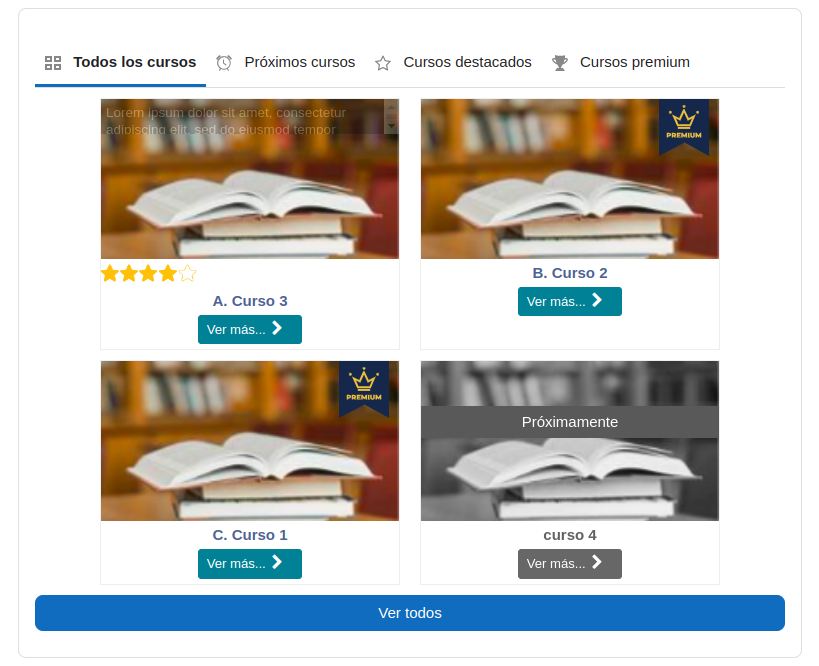
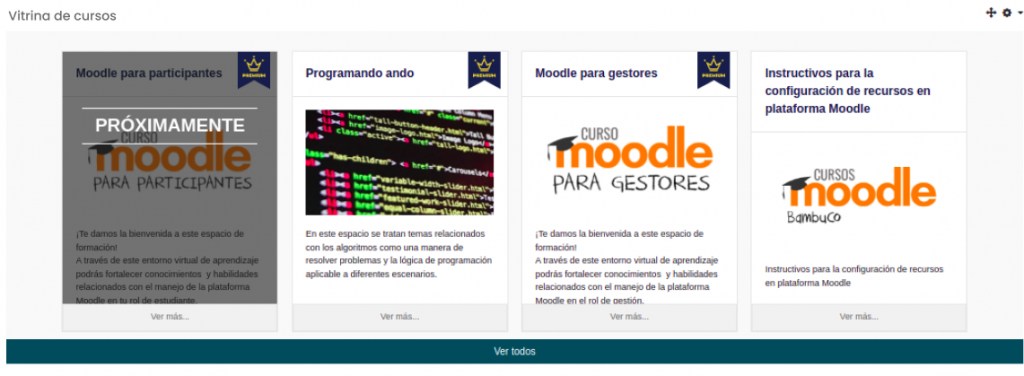
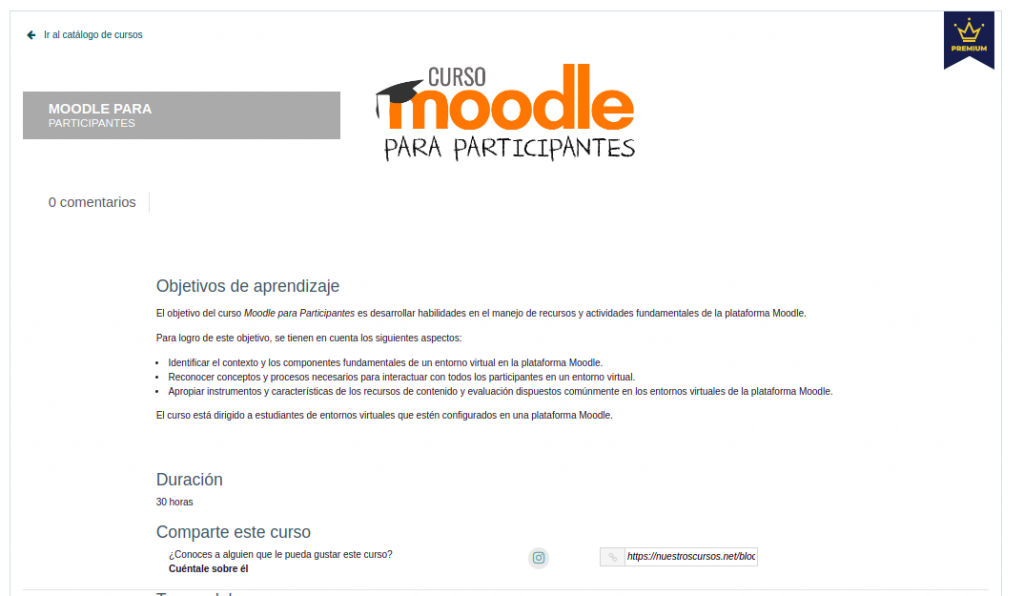
Once configured, the courses will look like in image 9. The “Show more…” button will take you to the full course view (image 10) defined by the dynamic fields configured within each course.
Note:
If the block is instantiated at the home pase, all users will be able to see it by default when they visit the platform. In addition, the block can be added in other places with customized content according to what you configure in the instance.
Configuration of dynamic course fields (metadata)
In order for the user to be able to view the information in the detailed view of each course, custom fields must be configured within the courses. To do this, go to “Site Administration”andin the “Courses”optionselect “Course Custom Fields” .

There you can create categories or groups of fields, the fields can be of different types (checkbox, date and time, drop-down menu, short text and text area).
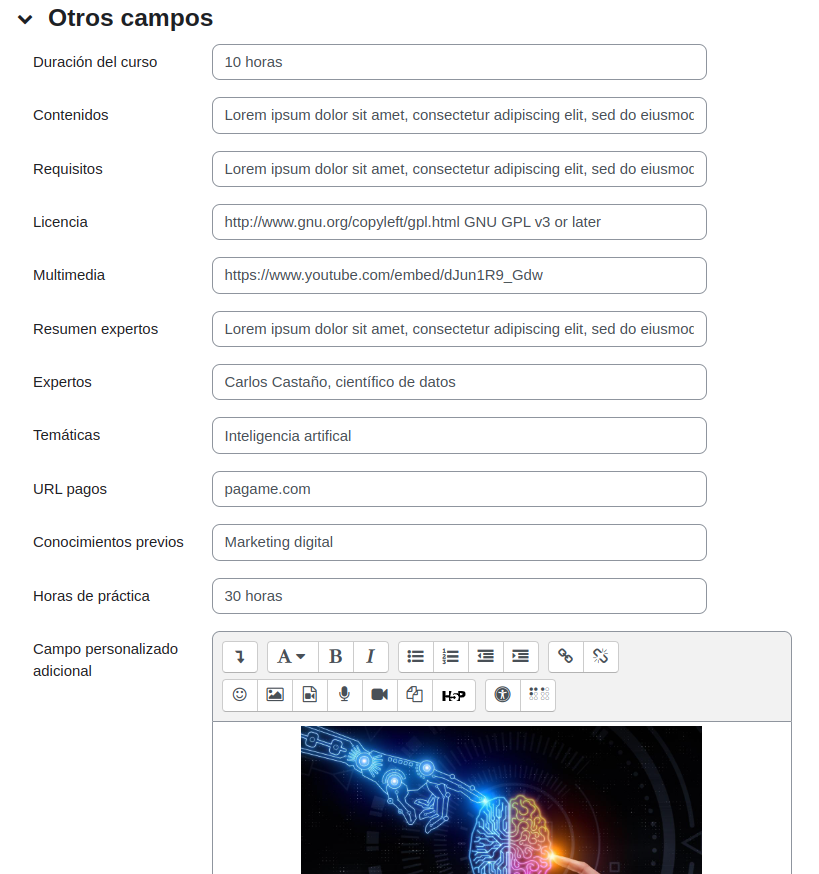
It is recommended to give a concise name for each field created, this name will be the one that will be visible in the description tab of each course.
The fields will be used to adjust the dynamic fields in the general configuration of the Showcase block. Once the fields are configured in each course, the user will be able to see expanded information.
Configuration of dynamic course fields (metadata) in the Showcase Block
Course fields
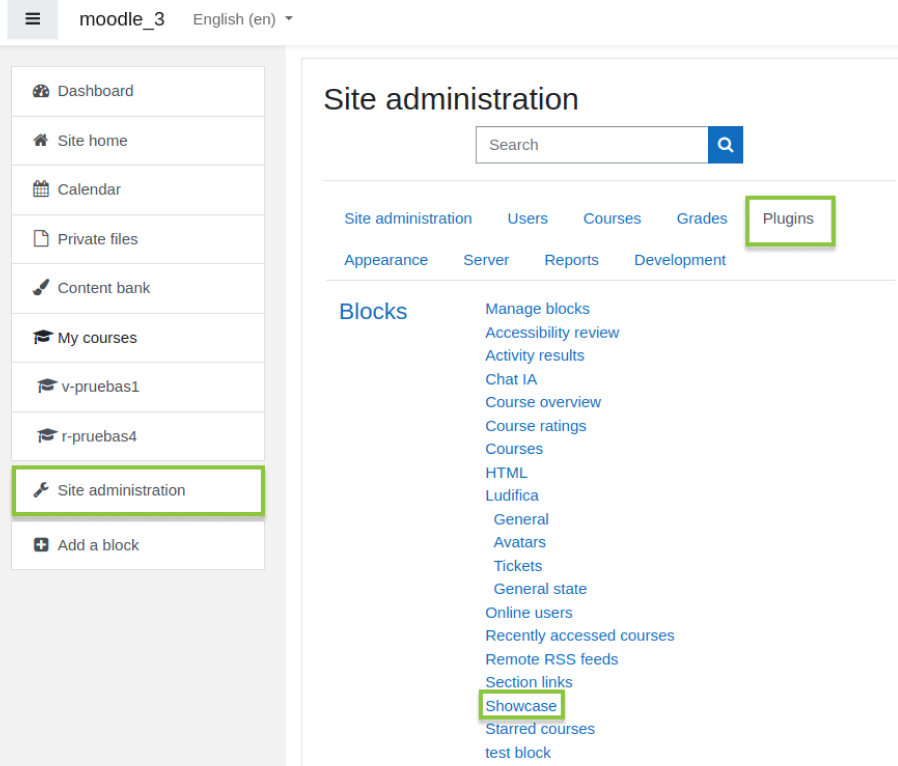
Go to the “Site Administration” and click on the option “Plugins”, there you will be able to see the blocks installed on the platform; by clicking on “Showcase”, you will be able to configure the dynamic fields.
Custom fields:
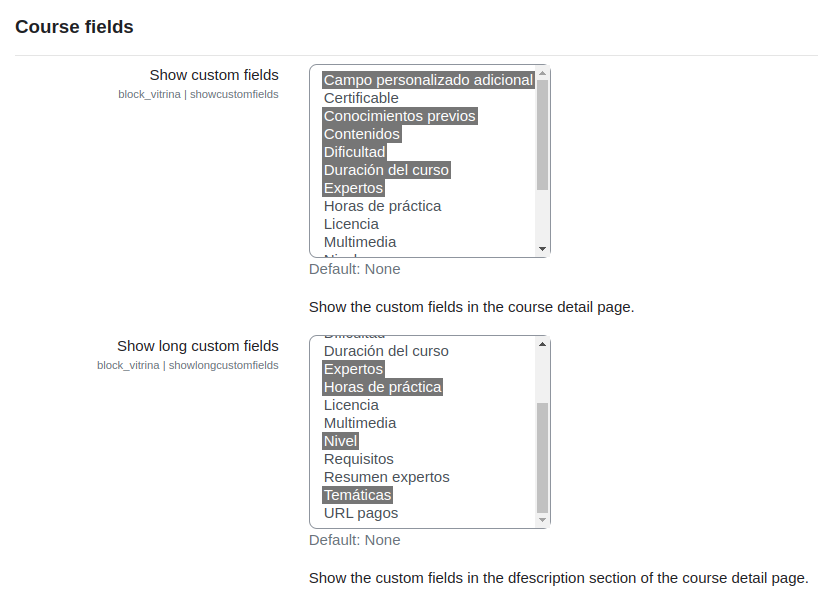
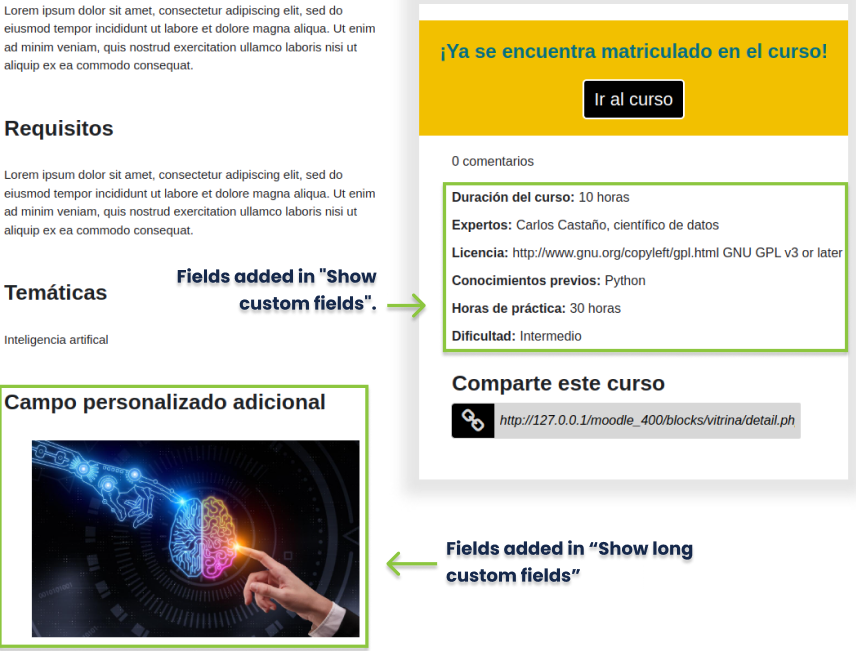
You can decide what information to display in the course detail view, for this you must first configure the custom fields (Site Administration / Courses / Custom Fields.) that correspond to the additional information you want to display about the course. The custom fields you define will be listed in the two configurations shown in image 15, ‘Show custom fields’ and ‘Show long custom fields’.
Those fields you choose in each configuration will be displayed like this:
Note:
The position and styles of the fields in the course details may vary depending on the template you have activated from the general block configuration. We will explain later how to change the appearance of the component.
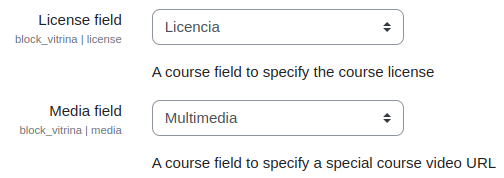
In addition to the custom fields, there are two more fields that the block has by default, the field to display the course license and a field to add the URL of the video you want to display in the course detail view.
Please note: Adding video to course detail view
The “Media Field” option shown in image 17, is used to add the link of a video in the configuration of each course, so that it can be displayed in the detailed view.

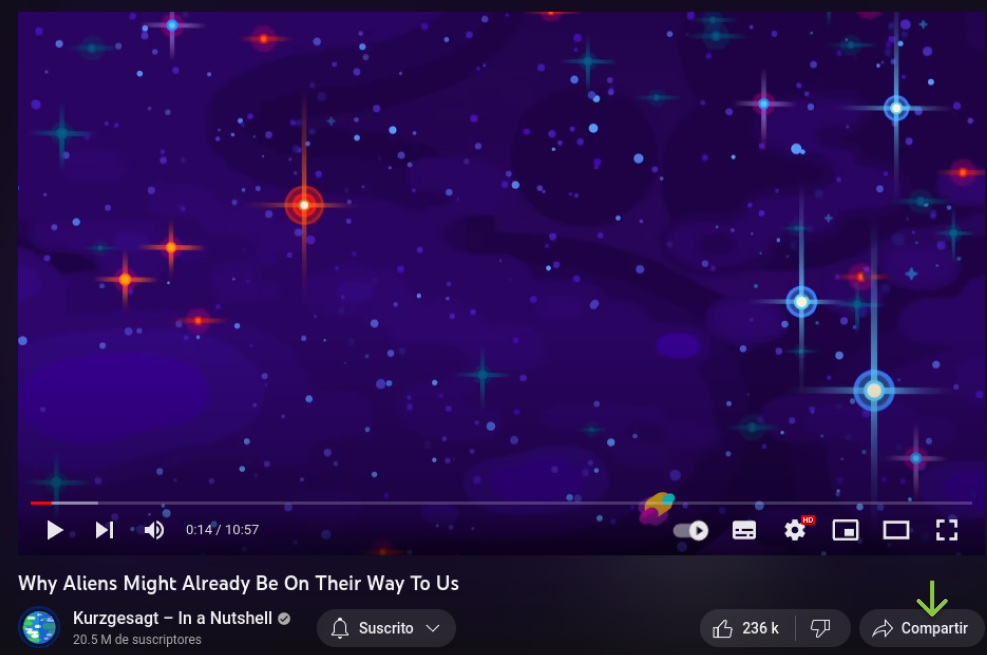
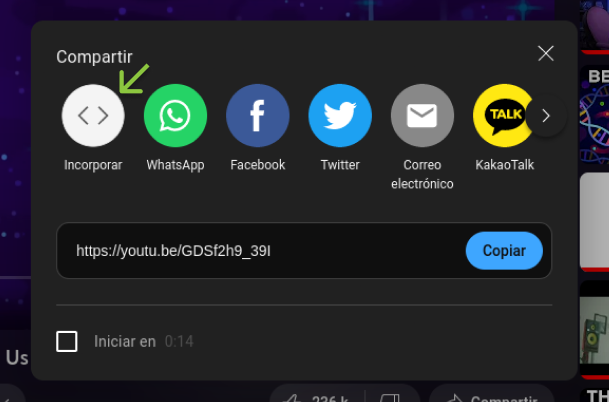
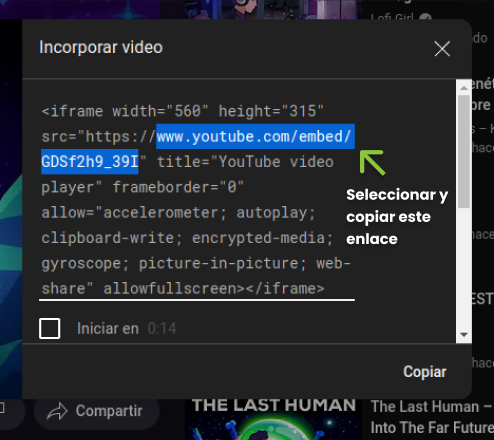
The link you add in the course field shown in image 18 must be the URL of the video, not the URL of the site that contains it. If you want to get the link from Youtube, you can do it in the following way:
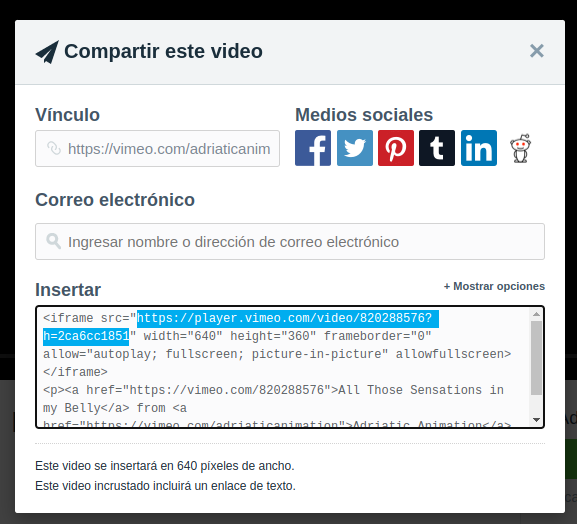
For the Vimeo platform is similar, the link to use will be the one selected in the following image:
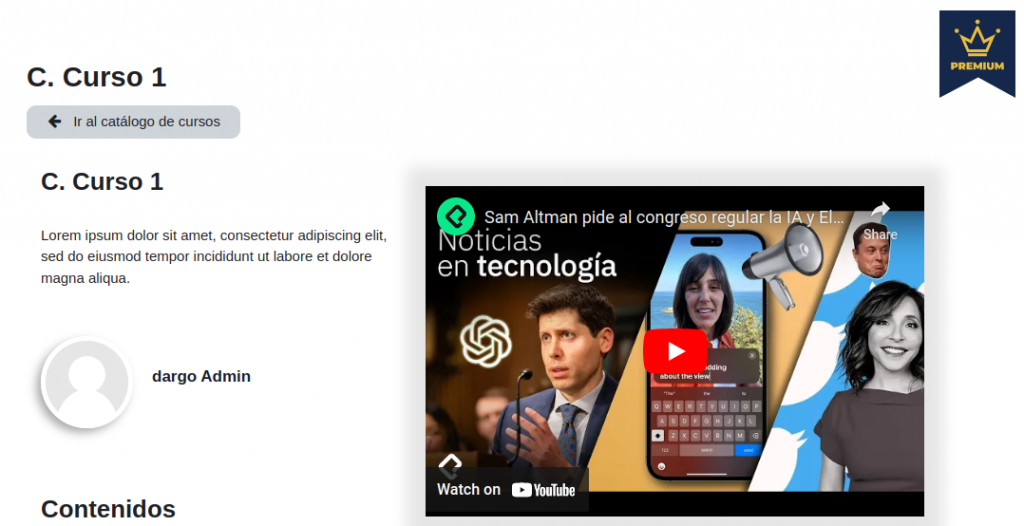
Once the link is added, you will be able to see the video in the detailed view of the course.
Course payment options
Payment URL field:
In case payment links are handled, the related information is configured in this section.
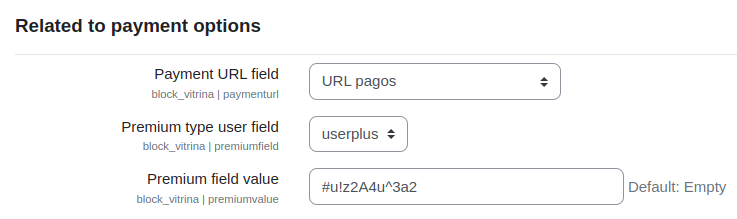
In the “Payment URL field” you must choose from the drop-down list the course custom field you have defined for this. Once set, you can add the payment link in the course settings.
Premium user field:
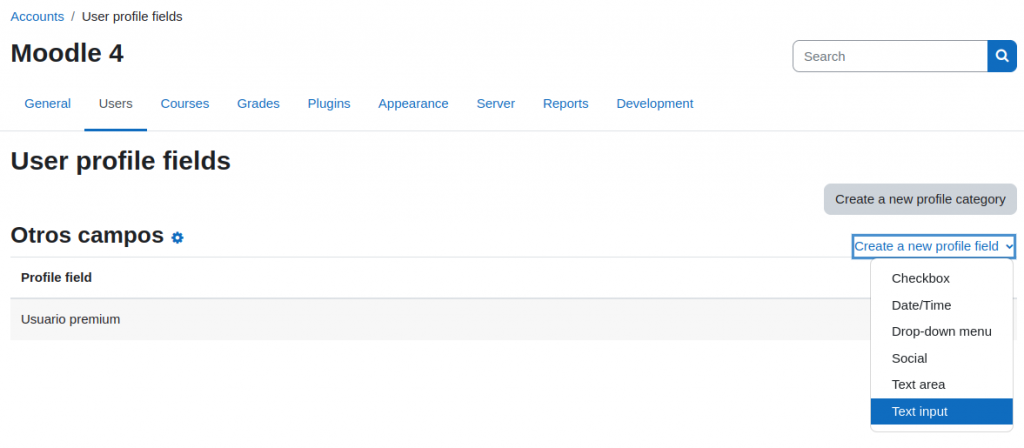
You can also define which users have access to the courses configured as premium, for this you must first create a User profile fields as shown in the following images:
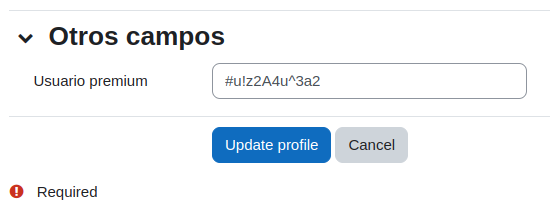
Once you add the User profile field and select it under Premium user field in the block configuration as shown in image 24, a value is added to Premium field value that you will later have to define also in the added field in the user profile:
When a course includes a payment link, a “Premium” label is added to the list of courses in the Showcase block and a link to the payment URL is added to the course file.
If you have a payment gateway configured on your site, you will see an additional button (Paypal in this case) in the detail view of those courses whose enrollment method you define as “Enrollment in payment”.

Find information about Moodle gateways here:
https://docs.moodle.org/401/en/Payment_gateways
Filtering
Categories:
Select in this field the categories with the courses you want to be displayed by default in the block.
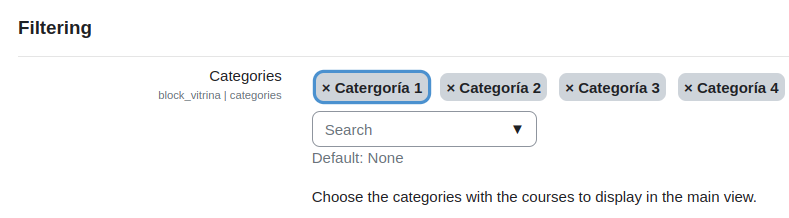
If you select a category, it does not take those that are nested, that is, if you want to see the courses of a subcategory, you must indicate that subcategory specifically.
Note, if you want the default block to always show all the courses available on the site, you can leave the Categories field empty.
If you want to publish the courses of a specific category on the home page of the site (or within any other page or course), you can instantiate the block there and in the instance settings, define the categories and other necessary values.
Users will be able to add and configure the Showcase block in their Personal Area as well.
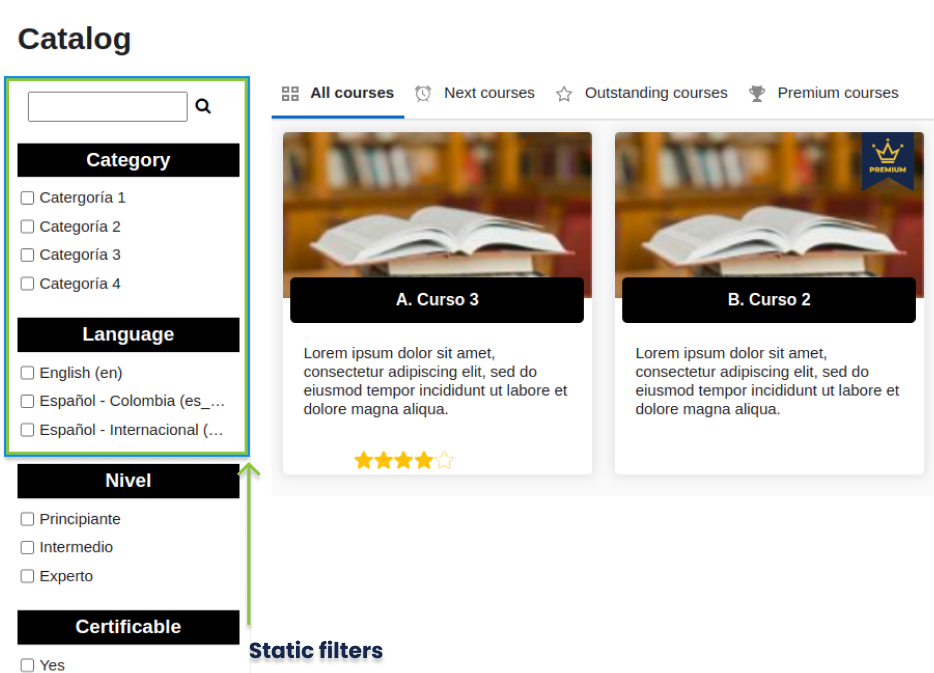
Static filters:
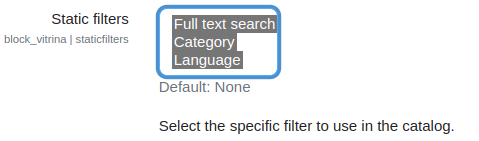
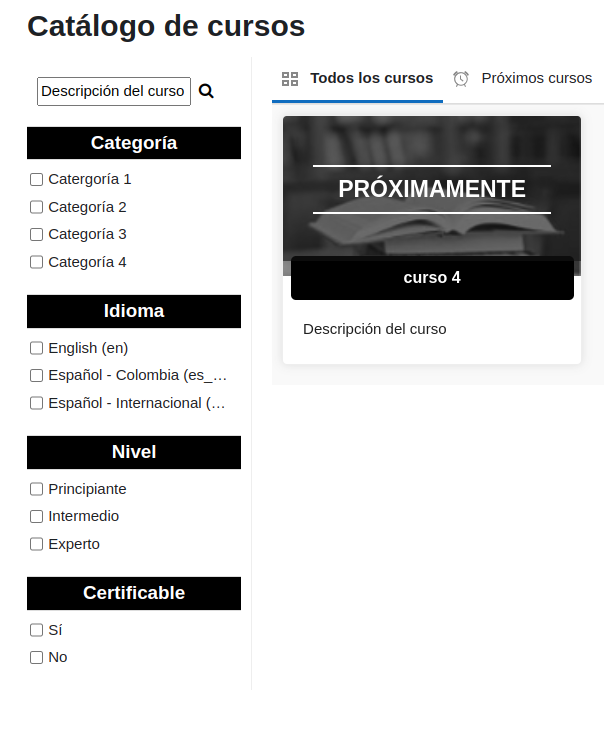
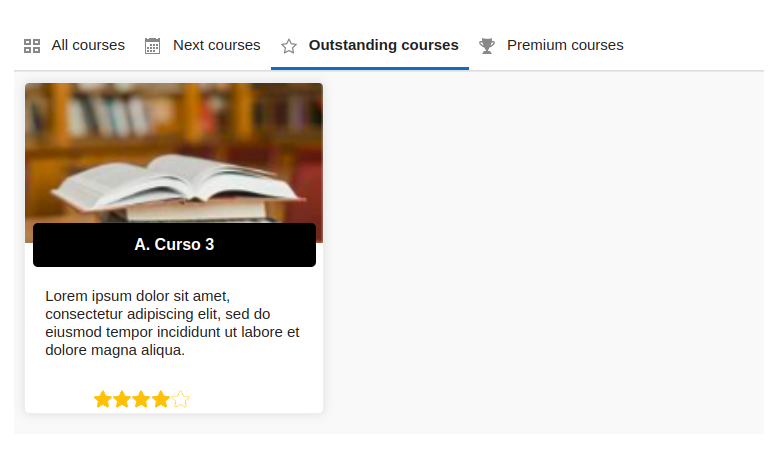
You can add filters to the Course Catalog view to make it easier for users to search, the block has the filters you see in image 32.
Filter by custom fields:
If you want to add your own custom filters in this view, you can do so as follows:
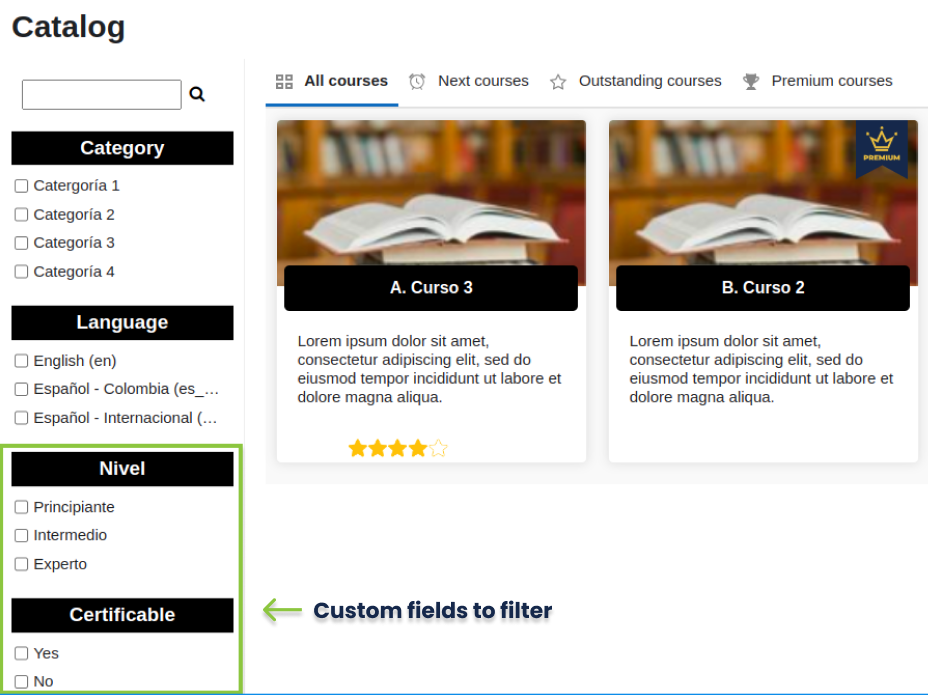
First you must create the course custom fields that you are going to select in the configuration. The fields must be of type Drop-down menu or Checkbox. If you do not have any fields that are of this type, you will not be able to see the “Filter by custom fields” setting.
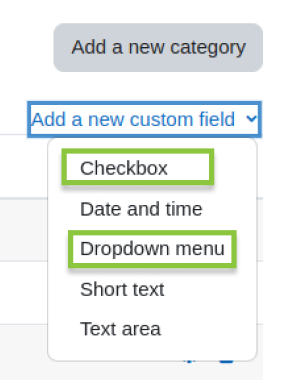

Once the fields have been created, you will be able to view the configuration and select those fields you wish to use for filtering in the Course Catalog view.

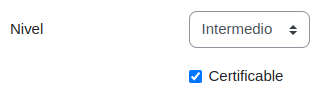
Finally, set the values that correspond to each course.
Keep in mind: Course catalog.
Los cursos mostrados en esta página del bloque pueden variar según desde qué instancia estés accediendo. Por ejemplo, si tengo agregado el bloque Vitrina dentro de un curso, entonces la configuración que le aplique a dicha instancia afectará lo que se mostrará al dar clic en “Ver todos” en la misma.

In the previous example we configured the block to show only one course, however, I have two categories selected, this means that by saving changes and clicking on “View all”, I will be able to see those courses that were not shown in the simple view with the categories configured in the block instance.
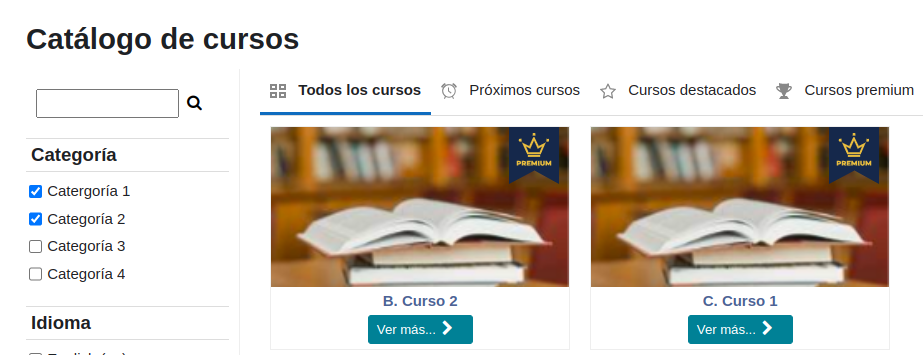
Also note that if there are no more courses to be displayed in addition to those displayed in the simple block view, then the “View All” button will not be displayed.
Filter by URL:
If you need to generate a link to the Course Catalog with filters already applied or with a specific view, you can do it in the following way:
By default, the link to the Course Catalog page looks like this:

But by modifying the URL parameters we can generate filters and share them.The first thing to clarify is that in a URL the parameters go after the question mark ‘?’. Once you identify it you will see that it has “view=default” defined. This refers to the view that will be shown in the URL. If you need to send a link and the first thing you want the person you are sending it to see is the Premium Courses view, the link should look like this:

The different values to use with view would be: ‘default’, ‘recents’, ‘greats’ and ‘premium’.
If you want the Course Catalog to have certain filters applied when you open the link, you can do it with the word ‘filters’ followed by the name of the filter and the option to select.
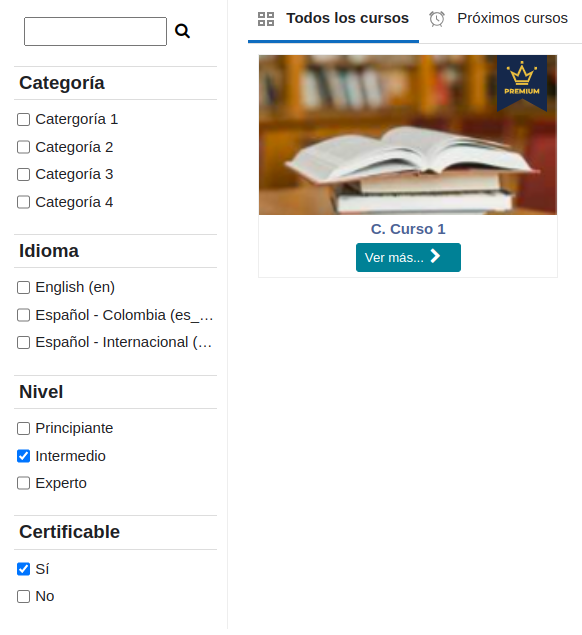
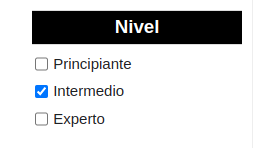
For example, if I want the person who opens my link to find the results of filtering those courses that are intermediate level, the link would look like this:

In this case ‘level’ is a custom filter so I must use the short name (or id) of the course custom field in the URL. Now, to indicate the option to use in the filter you must put after a colon the position of the option, in my case it is the number two, this only applies for filters generated with course custom fields.
The default filters that you can use followed by ‘filters=’ are: ‘langs’, ‘categories’ and ‘fulltext’.
For ‘langs’ and ‘categories’, the value after the colon is no longer the position but the numeric ID.
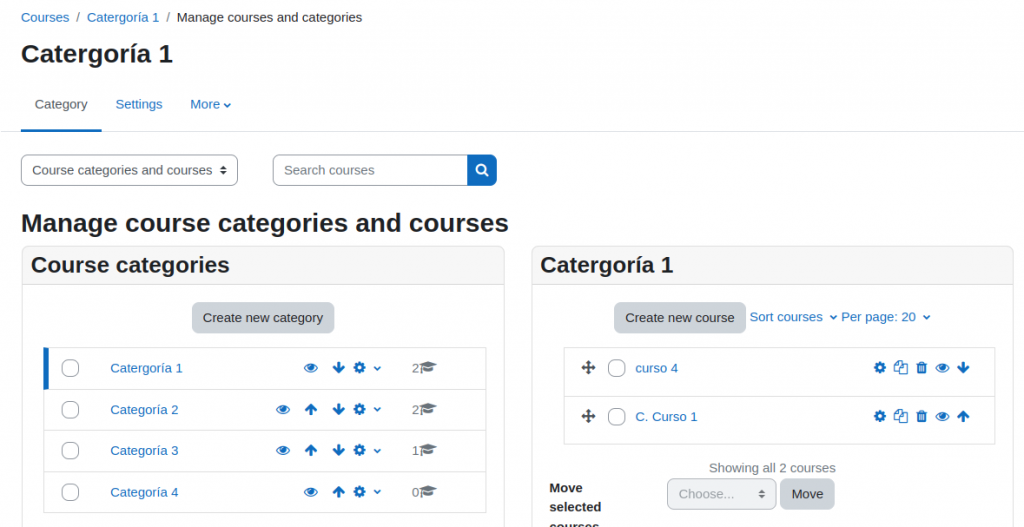
For example, if you want to filter by categories, you must use the ID of the corresponding category. You can get this ID in the path Site Administration / Courses / Manage courses and categories.
When you click on each category, its ID will be shown at the end of the URL, in this case it is number two.

The link to Course Catalog with the category filter would look as follows:


This can be useful for example if you need to link the courses of a specific category or any other filter and/or view you want to share.
You can also combine the different parameters to show a certain view with a filter applied, this is achieved with the symbol ‘&’ in the new parameter we want to add.
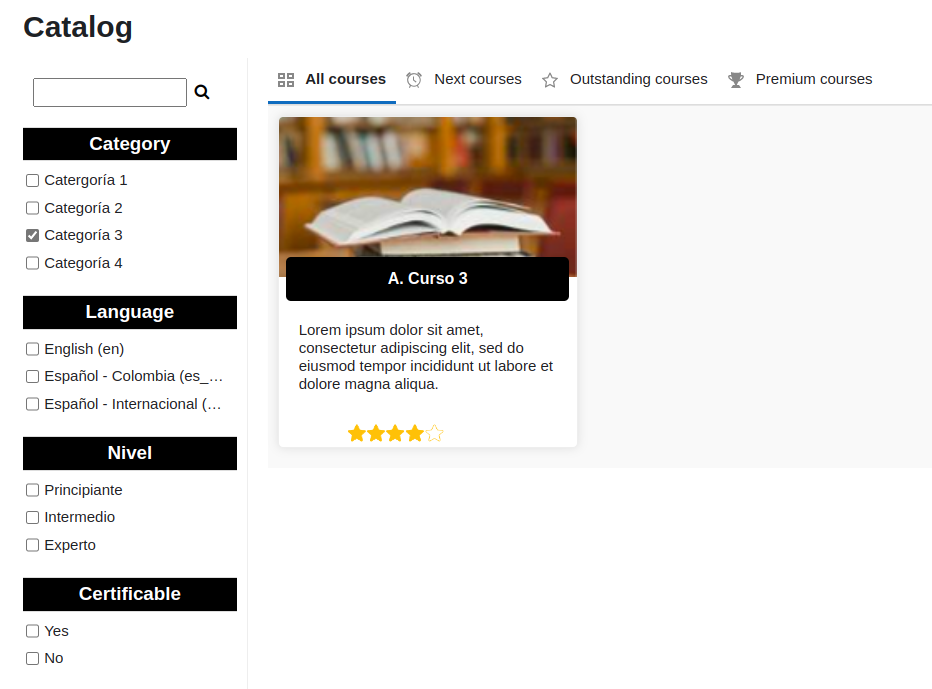
For example, if I need to show the featured courses of category 3, you can do it with the following link:

When you open the above link, the following will be displayed in the Course Catalog:
Finally, in addition to the checkbox filters, there is a search bar that you can also use to filter from URL. For this you must use ‘fulltext’ after ‘filters=’. In the value add your keyword or phrase as follows:

In the above example after the ‘fulltext:’ I did the search for the phrase “Descripción del curso.”
To encode your keywords or phrases in order to add them to the URL, you can use the following web application: https://www.urlencoder.org/
The result of the above URL would be as follows:
Appearance
In this section you can configure some options related to the appearance of the courses in the Course Showcase block:
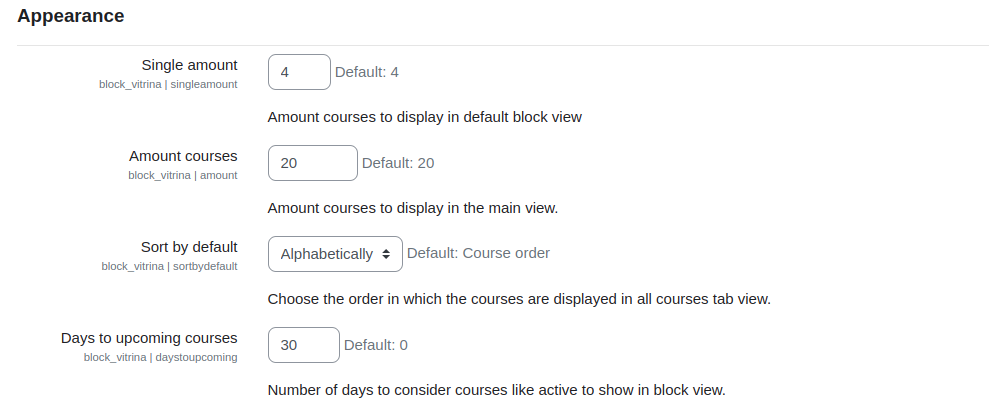
Simple quantity:
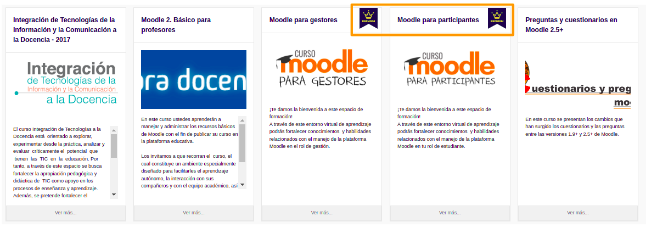
Indicates the number of courses visible in the initial view, in this case the configuration is set to show 4 courses.
Amount courses:
Indicates the maximum number of courses visible in the course catalog of the block.
Default order:
Choose the order in which the courses will be displayed in the default view:
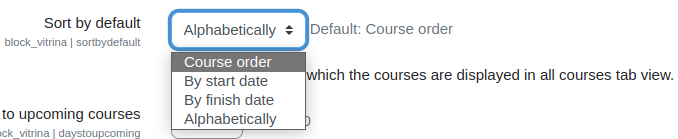
For example, if you choose ‘Alphabetically’, the courses will be displayed sorted by name:
You can also sort them by their start and end date.
In the sorting by end date, first will be listed those that have a defined and enabled end date (image 59), those courses that do not have this configured, will be shown last in the sorting.

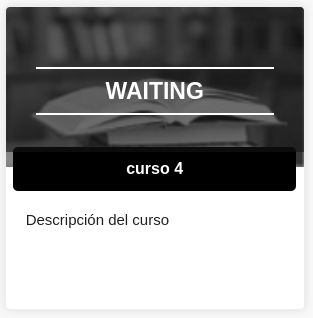
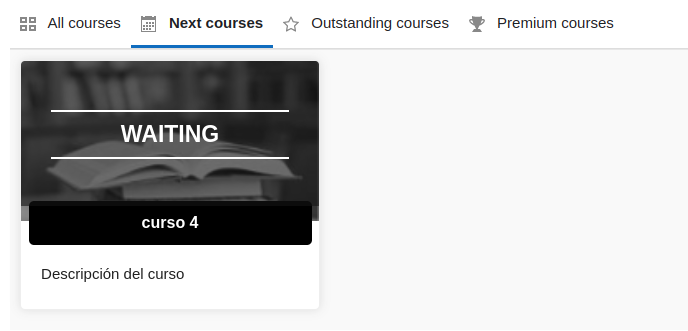
Days for next courses:
This option is used to indicate the number of days in which a course is considered to be about to start. In this case, the block setting is 30 days, which means that it will show those courses that will start at least before 30 days and, since they have not started, they will have a “Waiting” warning.
For this functionality to work properly, it is important to correctly configure the start dates in the settings for each course and the “Days for upcoming courses”field in the site-level settings.

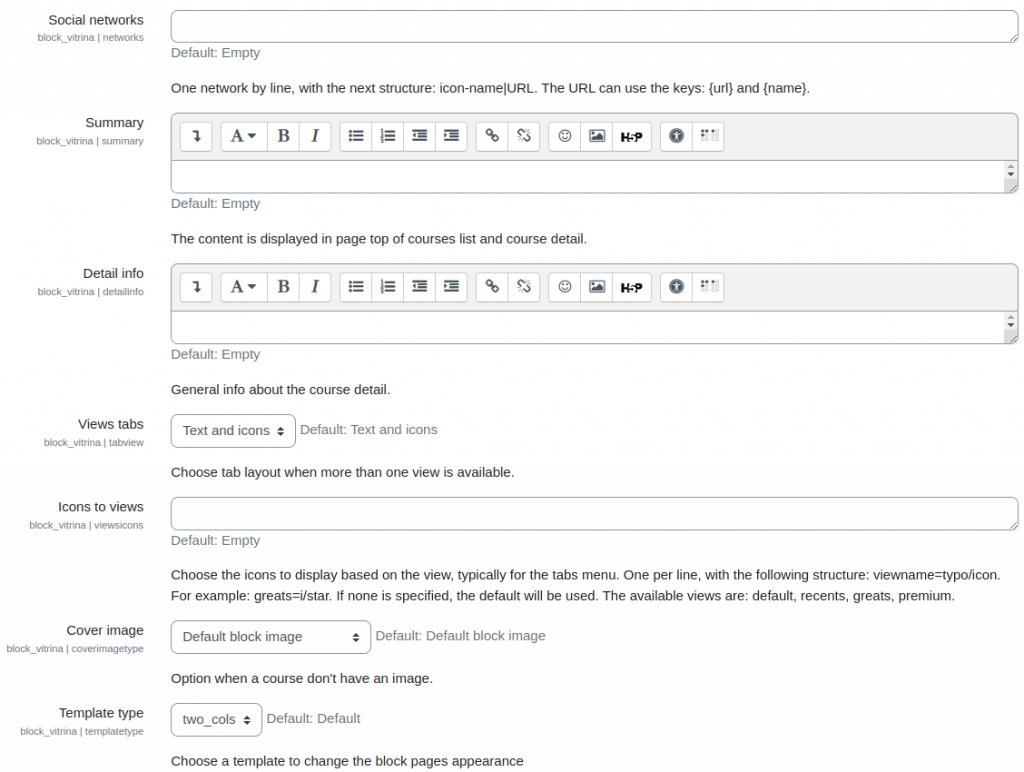
Social networks:
This option is used to configure the social networks through which the course information can be shared. The social networks must be entered one per line with the following structure: name-icon|URL (see image 63).

To customize the URLs you can use the keys: {url} and {name}. Some of the social network URLs that support this type of publication, with their respective structure, are:
facebook|https://www.facebook.com/sharer/sharer.php?u={url}&t={name}
twitter|https://twitter.com/intent/tweet?source={url}&text={name}
pinterest|https://pinterest.com/pin/create/button/?url={url}&description={name}
With this configuration, the options for sharing course information will look like in image 64.

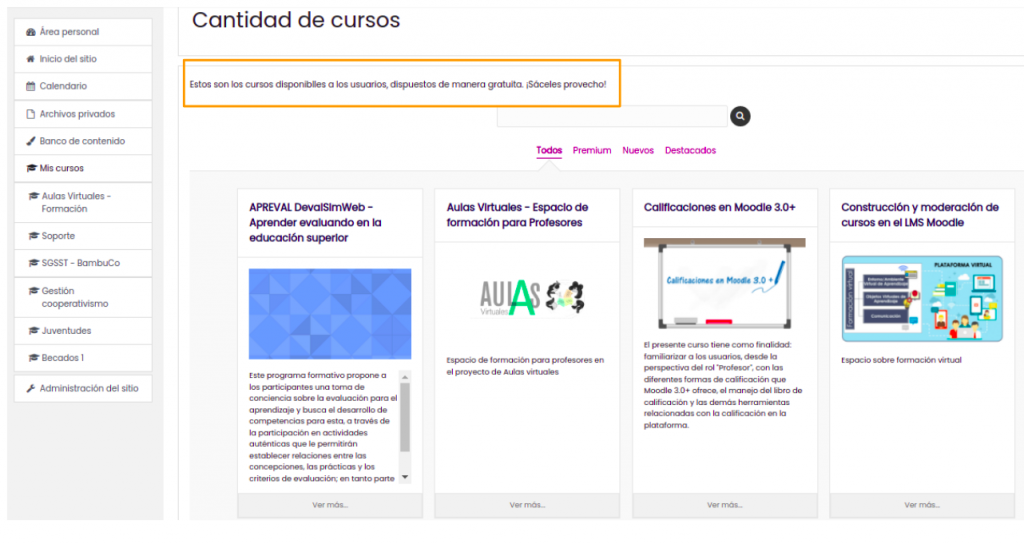
Summary:
The information configured here appears as a header at the top of the course listing or catalog.
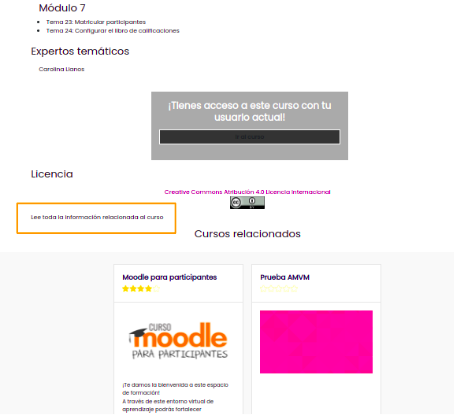
Detail info:
The information that is filled out here appears on the detail card of each course, usually at the bottom.
Tab view:
Configures the appearance of the tabs in the block instance.
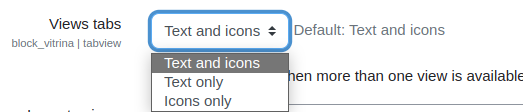
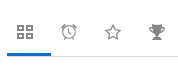
For example if you choose the option ‘Icons only’, then the tabs in the instances that have views enabled, will look like in image 70.
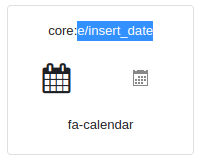
Icons for views:
The icons used to represent each view can be customized. For example, to change the ‘Upcoming courses’ view icon to a calendar icon, you can do so as follows:

Here is a list of the different icons you can use. For this you must copy the text selected in image 72 and paste it after the view name as shown in image 71.
Preview image:
This feature allows you to define the type of image to be displayed for each course for those courses that do not have their own image assigned in the course settings.
The preview image options are:
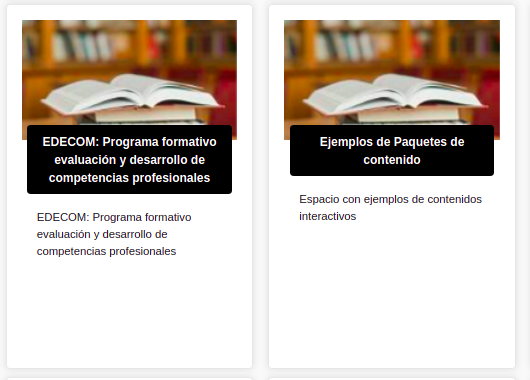
- Default block image: displays an image that is included by default in the block.
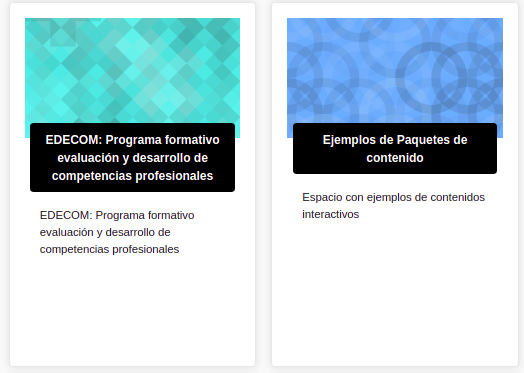
- Random generated textures: use the respective moodle functionality to generate a random image for each course. This type of images are usually textures.
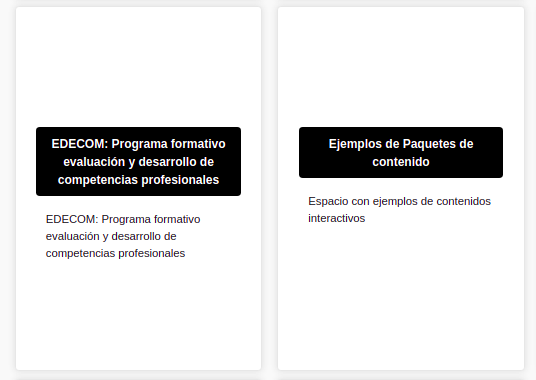
- None: does not show an image, in case the course does not have one the image section will be empty.
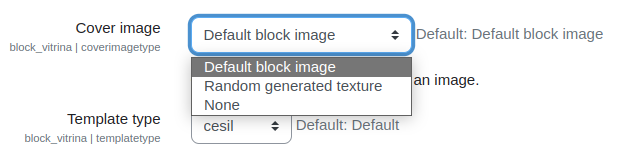
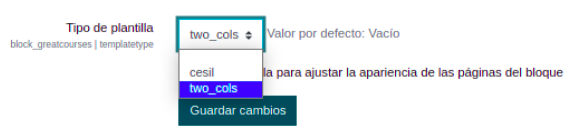
Template type:
In this option you can choose one of the preconfigured templates. These templates change the appearance of the different pages of the block, especially those of the course overview. Currently there are two possible options, in addition to the default view: Cesil and Two_cols.
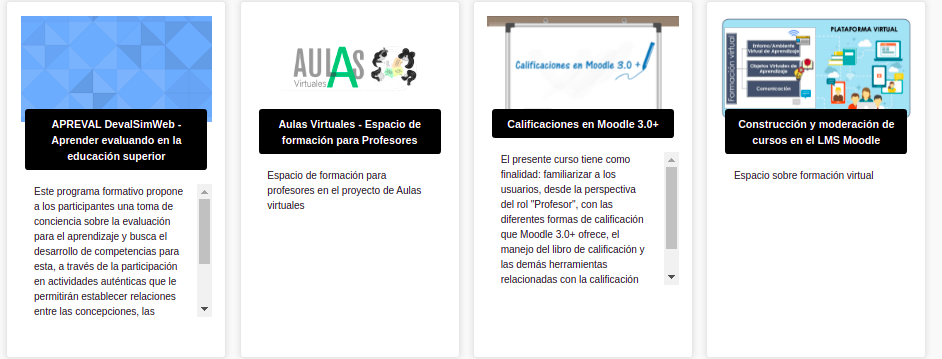
Great courses:
The Showcase of courses block has different tabs that display the courses on the platform, so that you can see all the premium courses, recent courses and great courses. This last filter works when the “Course Rating” block is installed, which allows users to assign a star rating. In this way, users will be in charge of highlighting the most popular courses that will be shown in this filter.
Course ratings block:
This is a third party block that does not have an update for the latest versions of Moodle, however, you can find an updated version by BambuCo at Github.
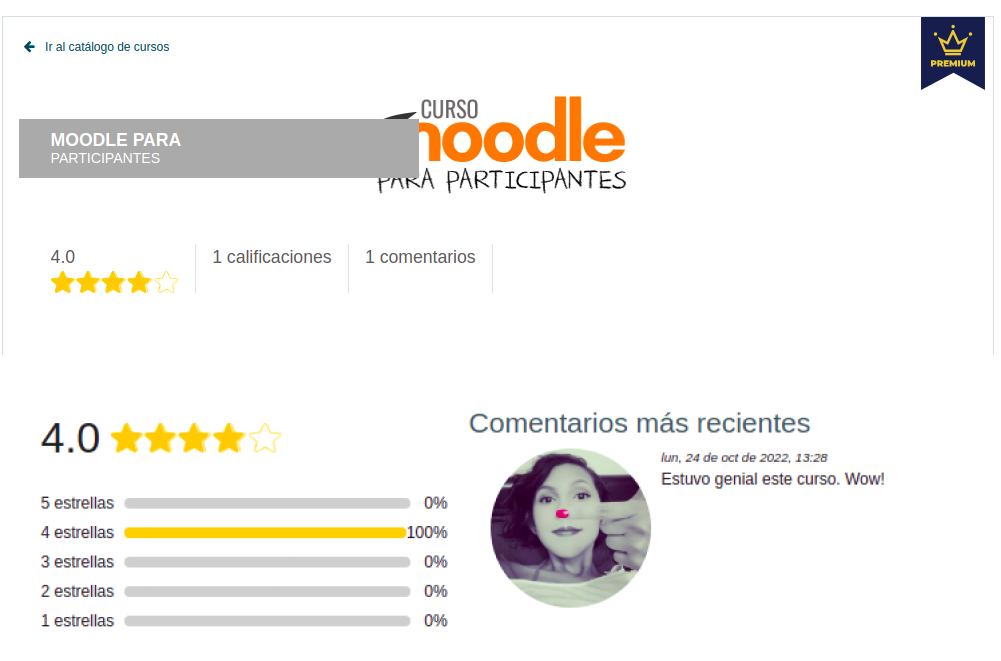
Through this block users can give their overall rating of the course using a five-star scale.
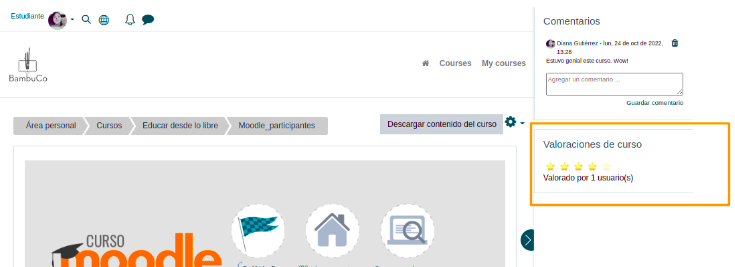
When the courses are rated by the users, the courses are displayed as highlighted, in addition, in the course detail card you will be able to see the detail of the ratings.

Comments block:
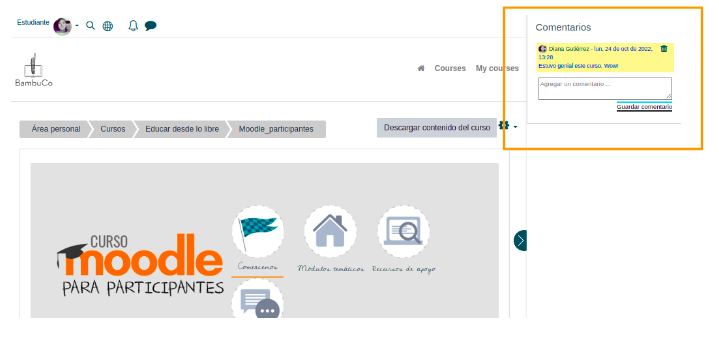
Another way for students to express their opinion of a course is through their comments. The latest comments appear in the course detail view (see image 87).
Add the Comments block in the choosen course:
Related courses:
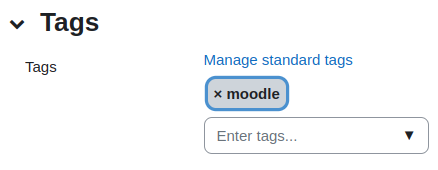
This functionality of the block allows you to see in the course detail view other courses to which it is related. To create the relationships in the settings of each course you must enter marks or tags that are related to each other. A course can have more than one mark or label and thus be related to one or more different courses:
Related courses will be displayed in the course detail view, usually at the bottom.
